Getting PyQt4 to work on Snow Leopard

I recently upgraded my Mac to OS 10.6 and I had to rebuild Qt and PyQt to get them working again. I installed Qt 4.5.3 from source and then installed sip 4.9.1 and PyQt4.6.1. Immediately it failed to work with the following error:

>>> from PyQt4 import QtCore
Traceback (most recent call last):
  File "", line 1, in 
ImportError: dlopen(/Library/Python/2.6/site-packages/PyQt4/QtCore.so, 2): Symbol not found: _sipQtConnect
  Referenced from: /Library/Python/2.6/site-packages/PyQt4/QtCore.so
  Expected in: flat namespace
 in /Library/Python/2.6/site-packages/PyQt4/QtCore.so

Some quick searching led me to this post, which implied that hacking PyQt’s configure.py file to force the architecture to be 64-bit would do the trick.
So where it says:
[python]
for a in sipcfg.arch.split():
if a == ‘i386’:
qmake_archs.append(‘x86_64’)
elif a == ‘x86_64’:
qmake_archs.append(‘x86_64’)
elif a == ‘ppc’:
qmake_archs.append(‘ppc’)
[/python]
Replace qmake_archs.append('x86') with qmake_archs.append('x86_64').
Now PyQt works again.

NWSClient Updated

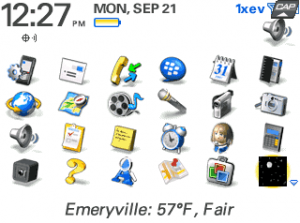
v118I’ve released a new version of NWSClient for Blackberry. New features include a link to a Google Map (if Google Maps for Blackberry is installed), and more customization options, including the option to have the current conditions and temperature displayed as the application’s name on the home screen.

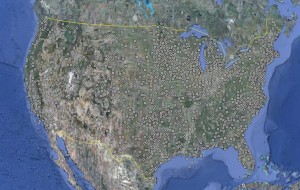
The Google Map link is helpful to see where your location is relative to the current NWS weather station.

NOAA keeps things interesting

UPDATE: I’ve released versions 1.14 and 1.15 which fixes the problem with the decimal temperature not displaying properly.

Ugh. This has been a crazy week for my little Blackberry weather app. The National Weather Service has decided to change the formatting of their current conditions XML file. The original product description (pdf) displays the temperatures as integers, but as of this morning NWS has started pushing temperatures with an additional digit of precision. This causes the temperature in the application icon to overflow its maximum size of three digits. Some users will see “NWS” instead of the temperature and some will see “err.” To be fair, the schema for the current conditions feed  indicates temperature is a decimal type, but I naively treated all values as string data for the sake of simplicity.

I have a fix that will strip the extra digits off of the temperature for display in the application icon. I plan to release this as a new version tonight.

NWSClient 1.1 Released

UPDATE 6/1/2009: The microscopic app icon problem has been resolved. The corrected version for Storm is v1.13.

UPDATE 6/1/2009: There’s a problem with the app icon appearing too small on Blackberry Storms.

Version 1.1 of my free Blackberry weather application includes the following upgrades and enhancements:

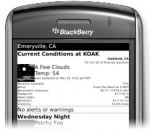
  • rolloverCurrent conditions are displayed as the application’s rollover icon

  • Links to nearest NWS radar and forecast discussions
  • Links to NWS alert and warning bulletins
  • The application no longer blocks when fetching weather
  • Added a user preference for the minimum font size
  • The location database is stored more efficiently, resulting in a smaller overall application size

This update is available for over-the-air install here.
A build for the Blackberry Storm is available here.

Announcing NWSClient

NWSClient
A Free Blackberry weather app.

Back in August I upgraded my phone to a Blackberry 8330 “Curve” from Verizon. I was disappointed with many of the free weather applications on offer so I decided to write my own that uses data provided by the National Weather Service and Google to display weather information for the United States and most world cities.

The result of this work is NWSClient, a Java app that displays current conditions, forecast weather, and alerts and warnings. I am distributing this application for free under the terms of the Gnu General Public License.

Please download NWSClient and try it out. Documentation and features list are here.

Java for Mac Update 2 leaves some Java Apps broken

This post has been updated, see below
This morning I applied Apple’s Java for Mac Update 2 and discovered that it broke my favorite editor and most-used application, jEdit. Other people seem to be having the same problem but there were few solutions. I found one that involves recreating the Application Bundle using the Java Bundler that ships with the Developer Tools. Here’s how it works:

  1. Backup your original jEdit.app application bundle (I called mine jEdit.orig.app).
  2. Open up jEdit.app (right click and do “Show Package Contents”). Navigate to “Contents” > “Resources” > “Java” and copy the jedit.jar file to your Desktop.
  3. Open up /Developer/Applications/Utilities/Jar Bundler.app.
  4. Next to the text field that says “Main Class” click the “Choose…” button and navigate to the jedit.jar copy that you just made on the Desktop.
  5. Make sure “Use Macintosh Menu Bar” is checked and press the “Create Application Button” at the bottom. Call the application “myJedit” or something else that distinguishes it from the original.
  6. Open up your new jEdit application bundle (“myJedit.app”) using “Show Package Contents” and navigate to Contents/Mac OS. Inside here you should see a file called “JavaApplicationStub.”
  7. Copy “JavaApplicationStub” from your new jEdit bundle (“myJedit”) to the Contents/Mac OS directory in your original jEdit.app bundle.
  8. Inside the original Contents/Mac OS directory you should see an alias called “jedit.” Rename this “jedit.bad” or something similar.
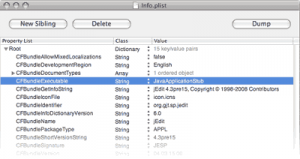
  9. Go one level up in the jEdit.app bundle to “Contents” and open up the “Info.plist” file. This open up using the Property List Editor (it lives in /Developer/Applications/Utilities).
  10. Expand the tree and change the ‘CFBundleExecutable’ string from ‘jedit’ to ‘JavaApplicationLauncher’.

That’s it! Close up the jEdit.app bundle and double click on it. jEdit should start normally as it used to, complete with the Mac Menu bar. Additionally, if you’ve installed the jedit shell script for launching jEdit from the terminal that should still work as well.

It’s not the prettiest solution but it keeps me going for now until a better fix is released.

UPDATE:
Someone in the Apple forums pointed out that simply copying the destination of the jEdit.app/Contents/MacOS/jedit symlink, which points to

/System/Library/Frameworks/JavaVM.framework/Versions/A/Resources/MacOS/JavaApplicationStub

back into jEdit.app/Contents/MacOS/jedit (replacing the symlink with a copy) also makes the jEdit application bundle work again. This method has considerably fewer steps than mine.

Apparently this file is functionally the same as the one generated by Jar builder. It seems Java developers went for the symlink method specifically to avoid problems created whenever Apple would go and update Java. With this update the symlink doesn’t seem to work again.

2D Transforms and QGraphicsScene

QGraphicsScene and QGraphicsItems use the QTransform class to move, scale, shear, and rotate objects in the view. For the most part, this works great. Things get a little tricky when you want to keep track of an item’s rotation in terms of a simple angular value. QGraphicsItem doesn’t have a method to get the “rotation,” and neither does QTransform. Instead we have to recover it from the transformation matrix.

The QTransform docs tell us that a rotation is measured in the clockwise direction. Rotation by an angle ? is computed for a given point using the matrix:

How to recover the angular rotation from this matrix? One way is to apply the same matrix to a point at x=0, y=1 and use some simple trig to figure out the angle between its original and new positions.

Enter the excellent atan2 function. Written in python, the math looks like this:

rotation = 180./math.pi * math.atan2(-xform.m21(), xform.m11())

Where xform is our QTransform object (the transformation matrix).

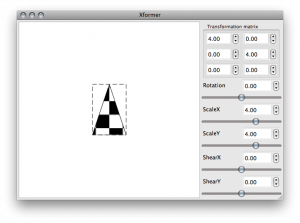
I wrote a little program, “Xformer,” in PyQt that demonstrates the relationship between an object’s QTransform matrix and its corresponding transformation, rotation, scale, and shear values.

Download Xformer and try it out. It requires a working copy of PyQt4.